Showing posts with label low-sodium recipes. Show all posts

Thursday, May 17, 2012

Lemony Asparagus Confetti Salad

Ingredients:

Please note that brown rice takes longer to cook than white rice. Plan your time accordingly, or cook the rice in advance. Using a rice cooker makes the job easier because you can turn your attention to the other ingredients while the cooker takes care of the rice. I find the rice cooker makes better rice than I can make by any other method and is well worth the money.
  • 3/4 cup uncooked brown rice (1 rice cup)
  • 1 tablespoon oil
  • 1 medium onion, chopped
  • 1 tablespoon fresh ginger, peeled and minced
  • 2 lbs. fresh asparagus, rinsed, trimmed and chopped into 1 inch pieces
  •  1 cup turnip or other fresh greens, rinsed and shredded
  • 1.5 cups precooked or (low-sodium) canned Great Northern beans, drained and rinsed
  • 2 tablespoons lemon juice
 Rinse and cook the rice according to package directions, or preferably cook in a rice cooker using the rice cooker's directions. While the rice cooks, prepare the other ingredients as follows:

 Heat up the oil in a large sauce pan over medium heat. Add the chopped onion and saute about 5 minutes until beginning to soften. Add the ginger and cook for three or four minutes more. Add the asparagus, cook for two minutes more, then add the greens and continue to cook for another minute or two until the greens just begin to wilt. Set aside until the rice has finished cooking.

When the rice is done, drain if necessary--this should be unnecessary if you used a cooker according to its directions. Stir the rice, the beans, and the asparagus mixture together in a large bowl. Drizzle the lemon juice over the mixture and stir well. Serve immediately or store in the refrigerator for up to three days. Serve warm or cold.

Wednesday, March 7, 2012

Yellow Split Pea Stew

Here is another great recipe made with the local and regional foods we've been purchasing through our online food co-op. This recipe has been adapted from Great Vegetarian Cooking Under Pressure by Lorna J. Sass. If you are new to using a pressure cooker, do a little reading first. This book is excellent to learn how to use one safely. Be sure to include the oil because split peas are foamy when they boil. The recipe serves 6.

  • 1 tablespoon sunflower, safflower, or canola oil
  • 1 tablespoon finely minced garlic
  • 2 teaspoons finely minced fresh ginger
  • 2 cups coarsely chopped onions
  • 1 teaspoon each  dried basil, oregano, and rosemary leaves
  • 1/2 teaspoon whole fennel seeds
  • 1 bay leaf
  • 1 medium sweet potato, chopped
  • 2 small turnip roots, chopped
  • 4 cups vegetable broth plus 2 cups water
  • 2 cups dried yellow split peas, picked over and rinsed
................................................................................................................................
  •  1/4 cup fresh  minced cilantro
  • 1 cup fresh watercress leaves
 Heat the oil in the pressure cooker. Cook the onion and garlic for 1 minute or two, stirring constantly. Stir in the basil, oregano, rosemary, fennel, and bay leaf. Add the sweet potato, turnips, broth, water, and split peas, making sure the mixture does not fill more than half the space in the pressure cooker. Bring to a boil.

Lock the lid in place, bring to pressure, reduce the heat just enough to maintain high pressure, and cook for 10-11 minutes. Remove from heat and allow pressure to come down naturally. Remove bay leaf, stir in the cilantro and watercress, and serve.

Update: I made a variation of this that skips the sweet potatoes and other spices (except the bay leaves) and uses turnip greens, fresh mint, and fresh oregano instead of the cilantro and watercress. I put the mint and oregano in a bouquet garni, which I removed before serving. Delicious!


Friday, February 24, 2012

Kale Tofu Lasagna Recipe


A gallon bag of fresh, nutritious curly kale came to me from the Coastal Farms online local food cooperative today. Joining has been one of the best decisions I've ever made. I didn't order apples from Saunders Brothers this week, for example, so I tried some that Don had bought at the local supermarket. They were nearly tasteless! They were watery and had a very slight apple flavor. I immediately missed my Saunders Brothers apples.

Studies show that the taste of our produce correlates to nutrition, so I know those supermarket apples aren't as nutritious as the coop apples, either. I told Don we're increasing our weekly order to at least 10 lbs. for as long as we can get them.

Did I mention Don has a voracious appetite for apples? The idea is to try to get through the week without buying from the supermarket.

 Don didn't argue. He can taste the difference, too.

The kale is tasty too, and a great source of Vitamin C. You can use it in lots of recipes where you'd use spinach. Here's my original recipe for a kale-tofu lasagna. It came out tasting as good as the picture looks above. I didn't have quite enough noodles, so I am estimating the number needed. It might be a little high.

Preheat oven to 350 degrees Fahrenheit.

Ingredients:

8 lasagna noodles, cooked according to package directions, drained. I suggest you get the water boiling while you are preparing the other ingredients, and then cook the noodles when the sauce is almost done.


Tofu filling:

  • 14 oz. organic soft tofu, drained and patted dry, then crumbled in a bowl with a fork
  • 2 tsp. lemon juice
  • 1 tsp. dried lemon peel
  • leaves from 2 sprigs fresh oregano
  • 1/4 cup nutritional yeast
  • 2 tablespoons wheat germ
  • 2 tablespoons ground flax seed

Sauce:

  • 1/2 large watermelon radish, peeled and diced
  • 3 tsp. minced garlic
  • 1 medium onion, peeled and diced
  • 4 cups clean kale leaves, tough stems removed, torn into bite-sized pieces
  • 1 14.5 oz. can diced no-salt-added tomatoes
  • 2 8-oz. cans low-sodium tomato sauce
  • 1 sprig thyme and 3 small sprigs fresh oregano, tied into a "bouquet garni."
  • 1 tablespoon olive oil
  • 2 tsp. sunflower or other oil
  • 1/4 cup Chardonnay wine

While the water is heating up for the lasagna noodles, mix all ingredients for the tofu filling. Set aside. While you are making the sauce, cook the lasagna noodles and drain. Allow to cool slightly .

Make the sauce in a separate saucepan. Heat up the sunflower oil over medium heat until hot. Add the garlic, radish, and onion, and saute until the onion begins to soften. Increase the heat to medium-high. Add the wine and the kale leaves and cover, stirring occasionally, until the kale leaves turn bright green and begin to turn tender. Add the other ingredients, lower heat back to medium, and heat through, stirring occasionally, until hot and bubbly. Remove from heat. Remove the bouquet garni and discard.


Spoon a little of the tomato sauce  into a 9x9" baking panvand spread it to cover the bottom. Line the bottom of the pan with a layer of lasagna noodles--I used kitchen scissors to cut them down to size. Layer half the tofu mixture, then more noodles, then sauce. Then layer the other half of the tofu mixture, then the noodles, then the remaining sauce. 

Put the casserole in the oven for 30 minutes or until hot and bubbly. Remove from the oven and allow to cool for 10 minutes before serving. Serves 2-4.

Update: I made a variation of this recipe that used a combination of swiss chard and sliced button mushrooms instead of the kale. It came out pretty good, too. I had some excess moisture from the mushrooms that I was too impatient to cook off, so I strained it into some vegetable broth I am planning to use this week. The juices look flavorful.


Sunday, February 19, 2012

Apple and Watermelon-Radish Muffin Recipe

This morning's muffin-making experiment turned out so delicious, I had to share. If you like your muffins sweet, replace the milk with an additional 1/4 cup of honey. I actually decreased the amount of flour by two tablespoons and substituted some flax seed meal and wheat germ, but this is optional:

Preheat oven to 400 degrees F. Grease 12 muffin tins (I lightly sprayed silicon muffin cups with vegetable cooking spray).

Ingredients:

  • 1 medium apple (we used Pink Lady) and 1 large watermelon radish, shredded, set aside, mixed with
  • 2 teaspoons lemon juice
Dry ingredients:
  • 1/4 cup all-purpose King Arthur flour
  • 1 3/4 cups King Arthur whole wheat flour
  • 2 tablespoons Featherweight Baking Powder
  • 1/8 tsp. ground cardamom
  • 1/8 tsp. ground allspice
  • liberal dash of fresh-ground nutmeg
Wet ingredients:

  • well-beaten whites from four eggs, separated (1/4 cup egg substitute will suffice instead)
  • 1/4 cup local raw honey
  • 1/4 cup milk
  • 1/4 cup sunflower or other oil
 Mix the dry ingredients together. Mix the apple/radish mixture into the dry ingredients, then stir in the wet ingredients until the batter is moist. Ladle into the muffin cups. Put in the preheated oven and turn the oven down to 350 degrees. Bake for 20 minutes or until done.


Saturday, January 21, 2012

Vegetarian Wheat-Berry Stuffed Cabbage Rolls

I recently ordered wheat berries from my local online food co-op because I wanted to experiment with them. I am finding them a delight to work with and to eat. I have to plan ahead, though, because they require pre-soaking and then 50 minutes of boiling to cook.

I took two cups of wheat berries, pre-soaked them, and cooked them overnight on low in a slow cooker. They came out a little mushy but delicious. And I have enough wheat berries to freeze some and to cook a couple of meals this week.

But what to cook?

One answer came when I received a big, beautiful cabbage from my CSA. Here it is, stripped of a few of its outer leaves:

I decided to make stuffed cabbage rolls with the outer cabbage leaves, the wheat berries, some fresh radishes, and some other ingredients I had around the house. I had never made stuffed cabbage before, but it was a lot easier than I thought. I thought I'd share the recipe along with some pictures.

First, take some root vegetables and mince them very fine. I used a food-chopper to save time. Suggestions are a small onion, a carrot, two cloves of garlic, and two mild-tasting radishes. Then chop up some unsalted raw almonds, maybe 1/4 cup's worth. Also cut up some fresh dill and oregano with kitchen scissors.  Keep the almonds and fresh herbs separate from the other ingredients.

Next, Heat up some oil and cook up the root vegetables for a few minutes until the onions and carrots begin to soften. Remove from the heat and stir in two cups of wheat berries along with the almonds and herbs, and set aside. Here's a picture of what the filling looks like when done.

Heat up water in a steamer. Strip off the outer leaves of a large cabbage, wash them, and cut the tough stems at the back of the cabbage even with the rest of the leaf so the back of the leaf looks fairly flat and even. If the cabbage leaves are very large, cut them in half. Steam 4 cabbage leaves, or four halves, if they are large, in the steamer until the leaves turn bright green and soft-looking, about 3 minutes. Add more leaves and repeat until you have enough. I found 8 halves filled a 9x9 glass baking dish nicely. Here is a picture of the leaves when steamed.

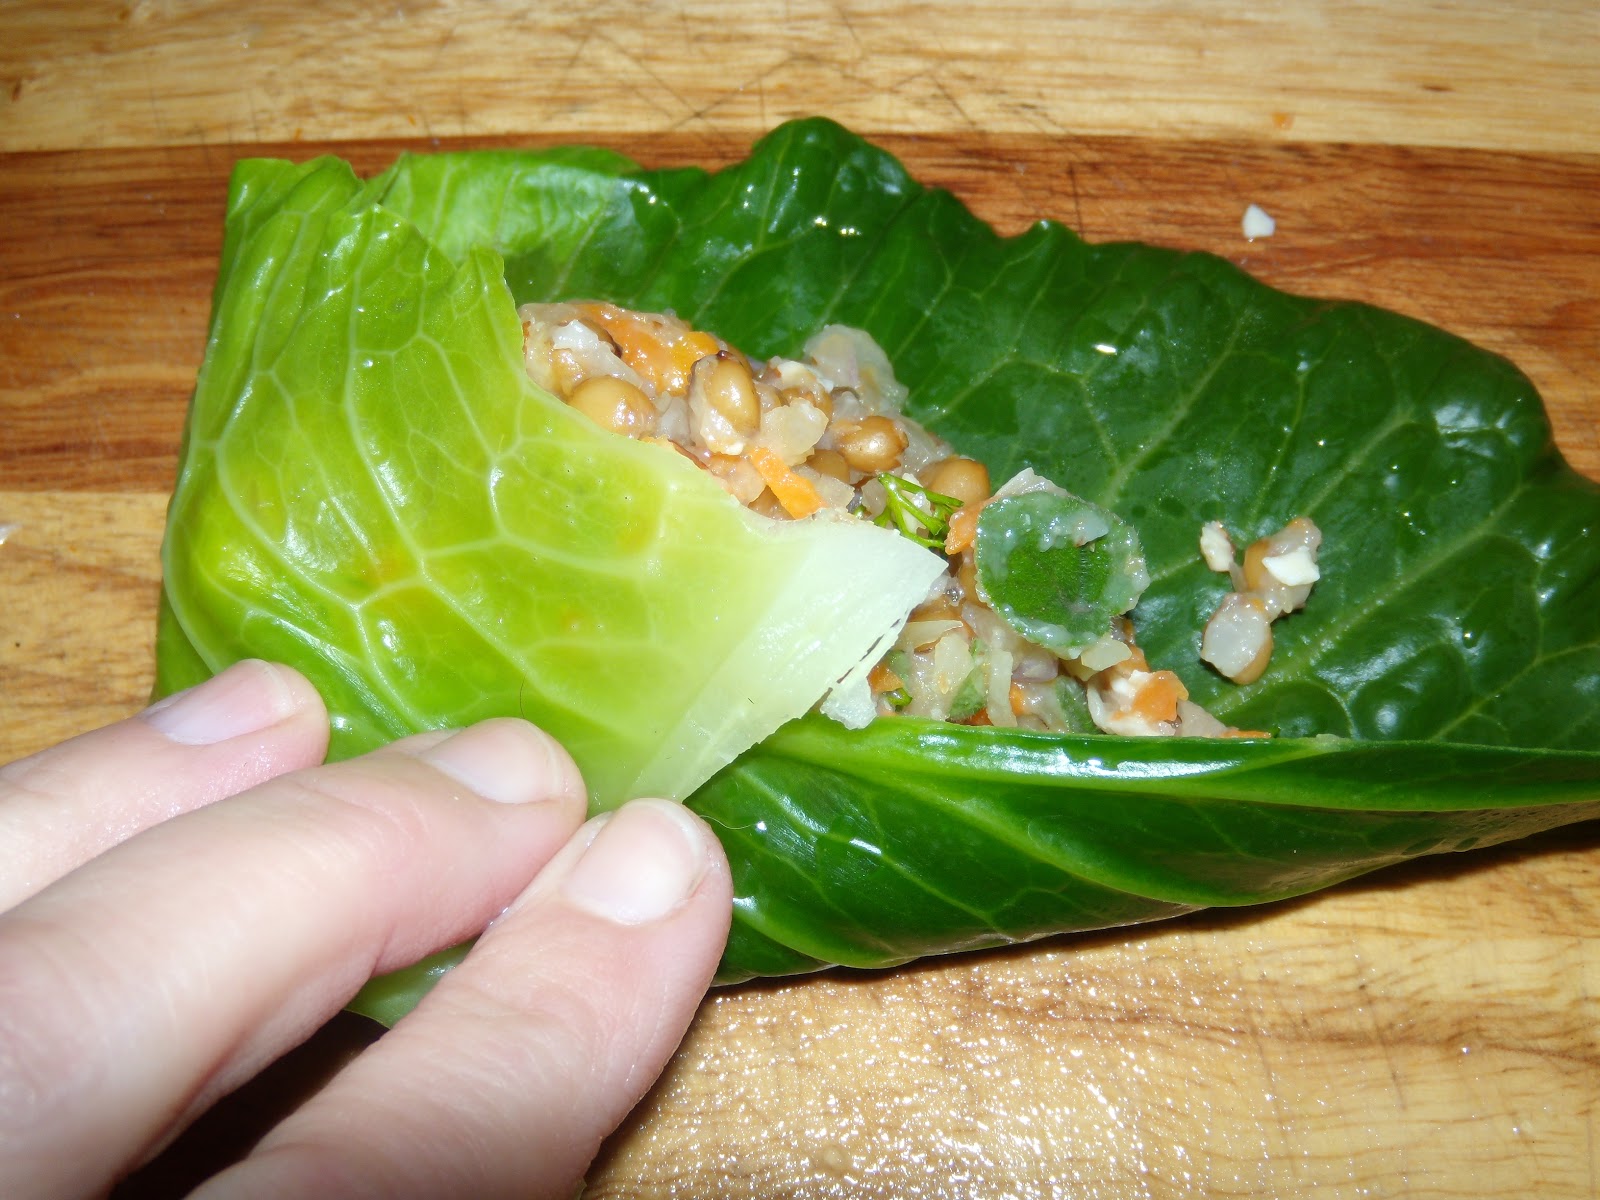
While the leaves are steaming, preheat the oven to 350 degrees F. Take some bottled or canned low-sodium tomato sauce (8 oz.) and spread just enough to cover the bottom of a 9x9" baking pan. Take each leaf (or half) and put 2 tablespoons of the filling in the middle and roll up as shown.

Step 1:

Step 2:
Step 3:
Step 4:
Step 5, roll the mixture up (away from you) to make a roll. Here is what the finished roll looks like:


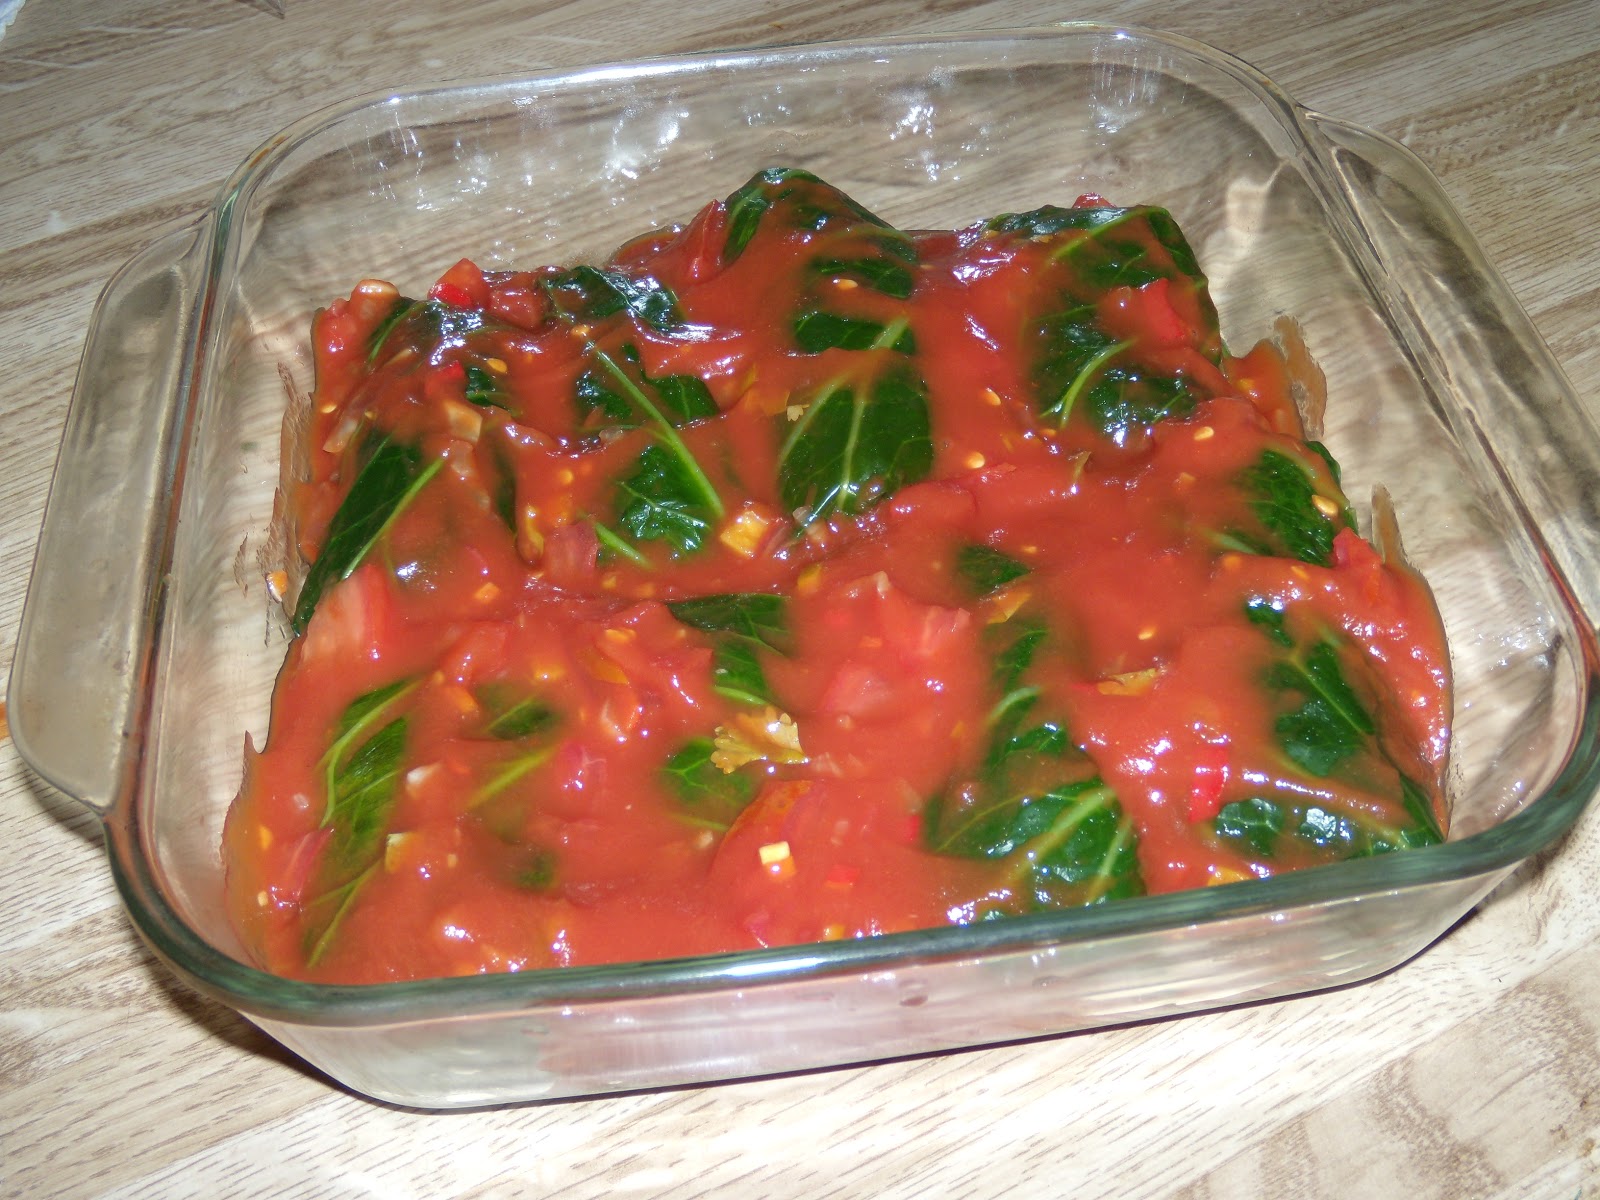
 Add the rolls, seam-side down, in the casserole dish:


Take the remaining tomato sauce and mix it with 2 tablespoons of salsa. We used a very spicy tomato salsa that I'd made from my own garden vegetables last summer. Newman's Own makes some nice salsas that are not overly high in sodium, however, if you need to purchase store-bought. Cover the cabbage rolls with the sauce/salsa mixture:


Bake this for 35 minutes or until bubbly and heated through. Let sit for two or three minutes before serving.

Wednesday, January 18, 2012

Corn Muffin Recipe

My husband, Don, is a cardiac patient. Here is a low-fat, low-sodium, low-cholesterol corn muffin recipe that came out great. I use King Arthur Flours:

Preheat oven to 350 degrees Fahrenheit. Grease 12 muffin cups.
Dry ingredients:

1/4 cup finely chopped unsalted (raw or roasted) almonds
1/2 cup corn meal
2 tablespoons Featherweight Baking Powder
1/4 cup unbleached all-purpose flour
1 cup whole wheat flour
2 teaspoons dry rubbed sage (optional)

Wet ingredients:

Egg whites from four separated eggs, or 1/2 cup egg substitute, beaten
1 cup nonfat organic yogurt
1/4 cup oil
1/2 cup honey

In two separate bowls, stir all dry ingredients together. Stir all wet ingredients together. Pour wet ingredients into the bowl of dry ingredients and mix just until all ingredients are moistened. Fill the muffin cups and bake for 20 minutes or until done.


Sunday, January 15, 2012

Shiitake Mushroom and Quinoa Soup

I ordered too many mushrooms from my online CSA this week. This recipe uses the caps for about 1/2 lb. of shiitake mushrooms. I threw the leftover peelings, extra celery, mushroom stems, etc., in a slow cooker to make vegetable broth with the trimmings, so there was very little waste.

1 tablespoon oil
2 tablespoons dried minced onion
2 celery stalks, finely chopped
3 cloves minced garlic
21/2 cups sliced shiitake mushroom caps
1/2 cup dry quinoa (pre-rinsed if needed)
1 teaspoon dry crushed rosemary
4 cups low-sodium vegetable stock (I make my own)
2 cups sweet potato, peeled and sliced into 1/2 inch cubes
1/2 cup turnip, peeled and sliced into 1/2 inch cubes (optional)
1/2 teaspoon dried lemon peel
2 tablespoons lemon juice
ground pepper to taste

Heat the oil over medium heat in a Dutch oven. Add the celery and garlic and cook until the celery becomes tender. Add the minced onion and mushrooms and cook until the mushrooms are tender, about 5 minutes. Add a little broth if the mixture becomes too dry. Stir in the other ingredients except the lemon juice and pepper, then increase the heat to high. Bring to a boil, then reduce heat and cook about 12-15 minutes until the quinoa is done and the sweet potatoes are tender. Remove from heat, stir in the lemon juice, season to taste with the pepper.

Friday, January 13, 2012

Wheat Berry Salad Recipe

This recipe is adapted from The Whole Foods Market Cookbook and is quite good. Be sure to plan the time to pre-soak the wheat berries before you cook, and use a sweet-tart apple. I used Pink Lady apples, but Granny Smith or Gala will do nicely. Once soaked, this takes less time than you think to make, because all the chopping can be done while the water is heating up and the berries are cooking. This recipe  serves six.

2 cups wheat berries
7 cups water
1 cup chopped unsalted almonds
2 medium apples, cored and chopped
1 cup chopped dried apricots
1/3 cup chopped fresh parsley or cilantro
1/4 cup apple cider vinegar
1/4 cup apple juice
1/2 teaspoon freshly ground pepper
1/2 teaspoon freshly ground nutmeg
1/2 teaspoon cinnamon
1/3 cup extra-virgin olive oil
1/8 cup lemon juice

Cover the wheat berries in water that covers by two inches and soak for 6 to 8 hours or more in the refrigerator. Drain the water and set aside the wheat berries. In a large stockpot or Dutch oven bring the water to boil. Add the wheat berries and let them simmer, uncovered, for 50 minutes. They will have a firm, chewy texture. Drain the water and set aside the wheat berries to cool.

Transfer the wheat berries to an extra-large salad bowl and add the other ingredients. Mix everything thoroughly and serve. The lemon will prevent the apples from discoloring, so this can be covered, refrigerated, and served the next day.

If you've forgotten to pre-soak the wheat berries, they can be cooked in about the same amount of time in a pressure cooker if they haven't been soaked.

Saturday, December 31, 2011

Don's Low-Sodium Pancake Mix

Don has adapted this recipe from the King Arthur Flour 200th Anniversary Cookbook. He has made it more heart-healthy by increasing the amount of whole wheat flour and reducing the sodium and cholesterol. He has made it fit better into busy lifestyles by making the portions very easy to measure. We keep this mix in an airtight container in the refrigerator. Be sure to keep it refrigerated. One time I accidentally put it in the flour cupboard, and it went rancid quickly. Here is the recipe in Don's words:

  • 6 cups King Arthur Stone Ground Whole Wheat Flour
  • 3 cups King Arthur Unbleached All-purpose Flour
  • 1.5 cups non-fat dry milk
  • .75 cup featherweight baking powder (Hains makes this)
  • 1 cup vegetable shortening (I use the Crisco bricks that come in a three pack)
I use a one cup measure and a one quarter cup measure for all of the dry ingredients.  The shortening comes in a one cup brick, so there is no measuring needed.
In any case, combine all of the dry ingredients in a large bowl and mix thoroughly.
Cut in the shortening.  I use two table knives.
To use the mix, my method is to use:
  • 6 measures of the mix
  • 1 measure of egg substitute
  • 4 measures water
If I measure them in that order, I only get one measure dirty
For two people I use a 1/3 cup measure.  If it is just me, I use a 1/4 cup measure.

Tuesday, December 27, 2011

Save Money: Dry Beans vs. Canned

In recent years I have come to appreciate homemade beans cooked from scratch. Beans are high-protein, high-fiber, inexpensive, and nutritious. Canned beans are convenient, but they are relatively pricey and often high in sodium compared to dry beans. There are an amazing array of varieties of dried beans to try, too. While cooking dry beans saves money, it takes a little planning. There are several options, but most cooks start with step 1:

Step 1: Pre-soak the beans. About 8-12 hours before you plan to cook the dry beans, put them in a colander, inspect, and rinse them. "Inspect" mostly means to check them over to be sure there are no pebbles mixed in with the beans. Any funny-looking beans can also be thrown away at this point. Put the rinsed beans in a large bowl or pot and cover with lots of water. Put the bowl in the refrigerator and allow the beans to soak.

 I put beans in to soak before going to work in the morning if I plan to cook them for supper. I'll soak them overnight if I plan to start cooking them in the morning. If pre-soaking beans seems like too much time or trouble, you will need to use a pressure cooker to make your beans. Go to "Option C," below.

Step 2: Drain the beans in the colander again and rinse them again. Discarding the soaking water is important because you will discard most of the sugars that make the beans "gassy" when you discard the soaking water. Now the beans are ready to cook, and at this point you have choices for Step 3:

Option A: Cook the beans. Put them in a large pot, cover with at least two or three inches of water and add one or two bay leaves. Bring to a boil. Then boil the beans, uncovered, until they are tender. How long this takes depends on the variety of beans and other factors. You'll need to research cooking times for the type of beans you are making, but the longest-cooking beans take up to 1 hour and 30 minutes to cook. Remove the bay leaves.

Option B: My favorite, and the reason I often start beans before work. Bring the beans to a boil as in "Option A," but only boil for 15 minutes. Transfer the contents to a slow-cooker and set the slow-cooker on low. Let the beans cook for several hours (about 8) or overnight. The advantage of the slow-cooker over the next method is that you can make more beans at once this way. Use some right away and store the rest in their own broth or soaked in water in the freezer to use later. The reason for boiling the beans before transferring to the slow-cooker is that some beans can be toxic if they are cooked insufficiently. The 15 minutes at a boil will ensure your beans won't make you or your family sick, so don't skip this step, even if it's a little more time and trouble. Remove the bay leaves.

Option C: The pressure cooker. Be sure to follow the directions on your pressure cooker. Do not overfill the pressure cooker. Generally you need to put a little oil in the water with the beans and the water to keep the beans from getting too frothy while in the cooker. Using a pressure cooker, you can cook pre-soaked beans in under 10 minutes and even cook unsoaked beans in under 30 minutes. If you choose not to presoak, I would discard the water the beans were cooked in and give them a good rinse to avoid a "gassy" product. Remove the bay leaves.

With pre-planning there is no reason to buy more expensive canned beans when you can cook up tasty, low-fat, low-sodium dry beans for your dinner. Use the cooked beans in chili, soups, salads, and all your favorite recipes in place of canned beans. One of my goals for my garden this summer is to grow some of my own beans to can or to dry for use next winter. Beans are not only good in your kitchen, they are good for your garden, too, because they help to fix nitrogen in the soil.


Wednesday, December 21, 2011

Slow-Rise Batter Bread (Yeast Bread)

Those of you who are regular readers know that my husband, Don, is a cardiac patient. He is on an low-fat, low-cholesterol, ultra-low-sodium diet to protect his heart and to keep his blood pressure low. Most commercial breads, even whole-wheat breads, carry a higher sodium content per slice that he should consume. He also tries to keep his overall carbohydrate intake down. He especially avoids the high-glycemic carbohydrates from the likes of white flour or potatoes, because these most reduce the effectiveness of some of his medications.

For all these reasons we have learned to make our own bread. Some readers may be surprised to read that bread does not need added salt, but it's true. In fact, yeast works better without sodium in its environment, so making unsalted bread is a snap. We have also learned how to work making home-made bread into our busy lifestyles on a regular basis. We both have jobs and many other projects and commitments in our lives. 

The answer for us has been to make a slow-rise batter-bread. Advantages are that the loaves do not have to be kneaded, a time-saver, and the dough can be left to rise on any cool spot in the house, which is great because warm spots are in short supply in our home at this time of year. Most of these ideas come from King Arthur Flour's 200th Anniversary Cookbook, my absolute favorite cookbook for basic baking, ever. (I know I plug King Arthur products a lot, but it's due to genuine love for the company's products). 

Making the bread is actually quite fast, the rising time is quite long, so by planning ahead and making the bread on a routine basis, I spend very little time on the bread, can get all kinds of other things done while it rises, yet have fresh, hot loaves available almost whenever we need them. Side-benefits are terrific flavor from the slow rise of the regular (NOT fast-rising) yeast and the delightful smell of bread rising and baking in the house. The resulting bread has a rich, almost sourdough-like flavor, too. 

This method uses less than the usual amounts of yeast and flour found in regular bread recipes. Before you start, you should know how to measure flour accurately, an essential part of baking bread. Visit this link for details and even a video on how this is properly done. I also recommend you know how to proof yeast. Search online for all kinds of how-to articles and videos, or read up in the King Arthur Flour cookbook or some other resource. 

You will also need two bread-loaf pans as well as the ingredients mentioned in boldface below.

When I wake up in the morning, I start the bread before I go to work. But if I want bread in the morning, I start it in the evening before bed. There are all kinds of variations on this recipe, but the basics are like this: take two cups of lukewarm water (about 80°F), one or two tablespoons sugar, and mix them together in a pre-warmed large glass or ceramic bowl. I add 1 teaspoon REGULAR yeast and proof the yeast. Once I am satisfied that the yeast is active, I add two cups of flour, usually 1 3/4 cup whole wheat and 1/4 cup all-purpose flour. I make all kinds of substitutions and variations at this point; I am quite a creative baker. For ideas on how to do this, I suggest consulting the King Arthur Flour cookbook, or leave comments below and I will respond as best I can. 

After you've stirred the flour(s) into the water,cover the top of the bowl with plastic wrap and leave the dough, called a "sponge" at this point, in a cool spot to rise. The ideal temperature is between 50 and 60°F. For even slower rising times and an even more flavorful bread, the sponge can be covered and left to rise in the refrigerator, but I rarely have room in the 'fridge for this.

Several hours later, after getting home from work, for example, you will find that the sponge has risen considerably or "doubled." Mix two more cups of whole wheat flour into the sponge to form the batter for your bread. If you like and can eat (optional) salt in your bread, this is the time to add it in (no more than a tablespoon at most; Don and I skip this step for the sake of our health). Another option, whether you add salt or not, is to add a tablespoon or two of (optional) vegetable oil. The benefit of the oil, besides its flavor, is that the bread will keep a little better after it is baked. The disadvantage is the added fat and calories, so the decision is up to you. The bread should come out fine whether you add the oil or not. Stir them in with the flour just until they are well mixed and no more. 

The batter will be quite wet compared to a regular bread at this point. This is what makes it a batter bread. It does not require kneading and will come out quite moist, but its texture will be much coarser than a kneaded bread. Let the batter rest for a few minutes while you grease the two bread pans.

Divide the batter evenly between the two pans, cover the top of the pans with plastic wrap or a damp towel, and leave to rise again. Since your yeast have multiplied and are hopefully very active at this point, your dough should rise a little faster. How long will mostly depend on the temperature. When I am cooking supper in the evening, for example, I will often put the loaf pans on the counter near the stove or oven to benefit from the added warmth. Let the dough rise until it is about an inch or so from the top of the pans. 

Toward the end of the rising time, preheat the oven to 350 degrees and put the pans on a rack in the middle. Bake for 35 minutes, then remove and turn out on to a rack to cool. 

My final recommendation is to allow the loaves to cool completely before eating or storing them. This is the hardest part, because the bread will smell so wonderful, you won't want to wait to cut into the loaves. They will keep better and be moister if you do not allow the steam to escape from them by cutting into them too soon, however. 

Sometimes I care; sometimes I can't resist temptation.

Wrap the uneaten portion of your loaves tightly and store on the counter at room temperature. Use within the next two to three days. Other options are to store them in the refrigerator or freezer, but this will rob your loaves of moisture. 

Enjoy!


Saturday, December 17, 2011

Heart-Healthy Kale Pie

This savory vegetable pie recipe was adapted from Mark Bittman's cookbook, "How to Cook Everything Vegetarian" but I reduced its sodium, fat, and cholesterol content. I used locally-grown kale, but "collards, spinach (squeezed and chopped),  broccoli, cauliflower, cabbage, and mushrooms" can be substituted, instead. Other variations for fillings are mentioned in his cookbook.

  • 2 tablespoons heart-healthy margarine such as Smart Balance, plus more as needed
  • About 5 cups shredded kale leaves, stems removed
  • 1 medium onion, sliced
  • Black pepper
  • 1/4 cup chopped mixed herbs, such as thyme, parsley, chives, and chervil; I used garlic scapes, cilantro, thyme, and finely chopped radishes and radish greens from my garden
  • 5 egg whites
  • egg substitute equivalent to 4 eggs, poached in the microwave as explained in my previous blog post
  • 1 cup non-fat plain yogurt (we like Stonyfield Farm)
  • 3 tablespoons grapeseed Vegenaise (Vegan mayonnaise)
  • 1 teaspoon Featherweight Baking Powder, a low-sodium baking powder; it is available online if you cannot find it in local grocery- or health-food stores
  • 1 cup whole wheat flour
  • 1/4 cup all-purpose flour
We like King Arthur brand flours or a similar high-quality flour.

Preheat the oven to 375 degrees F. Heat the margarine in a large skillet over medium heat. Add the kale and onion and cook, stirring occasionally, until the leaves are quite tender but not brown, about 10 minutes. Remove from the heat, add the herbs, and season with pepper to taste. Coarsely chop the poached eggs and add them to the kale mixture. Let cool while you make the batter.

Combine the yogurt, Vegenaise, and egg whites. Add the baking powder and flours and mix until smooth. Lightly grease a 9x12 glass baking dish. Spread half the batter over the bottom, then top with the kale filling, then smear the remaining batter over the kale using a rubber spatula to spread the batter so there are no gaps.

Bake for 45 minutes. The top crust will be shiny and brown. Let the pie cool for 15 minutes or more before slicing it into squares or rectangles to serve. Serve warm or at room temperature.