Wednesday, March 14, 2012

How Much Space Do Laying Hens Need?

I live in Chesapeake, Virginia. I want to keep three or four laying hens in my residential back yard for reasons I outlined in Longing for Urban Chickens.  Chesapeake used to allow chickens only on property zoned for agriculture with an exception for a flock of up to four hens that could be kept as "household pets" in certain residential zones, but only on properties of three acres or more.

This law was unnecessary and elitist. What this meant was that in residential areas only the wealthy could own a local source of fresh, healthy eggs. Those wealthy enough to own large lots could enjoy the benefits of chickens in their gardens. But the average hard-working Joe, who probably needs the nutritional and other advantages of keeping chickens much more than his richer neighbors, was shut out by the "Powers That Be."On November 20, 2012, the Chesapeake City Council voted to allow up to six hens on single-family residential lots with certain restrictions. There had been a one-year sunset clause on the legislation, but our Facebook group, "4 Chesapeake Hens," successfully worked to keep chickens legal.

The March/April, 2012, issue of Urban Farm magazine outlines the minimum space requirements for keeping chickens. And--surprise!--three acres is major overkill for a microflock of three or four hens. Author Kelly Wood has been keeping chickens, bees, and other critters on her 1/2 acres farm in Oregon for more than eight years. According to her article, laying hens require, per bird, a minimum of:
  • 1.5 square feet inside of a coop
  • .75 (that is, 3/4') of perch space inside same coop
  • 1.5 square feet of space in a nest box in the coop
  • 8 square feet in an outdoor run
And that's it! Even multiplying this requirement of less than 12 square feet per bird by three or four hens, there was obviously no reason to require three acres to keep hens other than to deny the benefits of chicken-keeping to most working-class families in Chesapeake. And, in case you are curious, other types of chickens, such as bantams and broilers, require even less space than laying hens, so the requirements were not in place with the protection of any other type of chicken in mind.

Chicken Health for Dummies recommends a 1/2 square foot of space (inside) for chicks up to four weeks old, 1 square foot for chicks from 4-8 weeks old, and 2 square feet for chicks 8-12 weeks old. Meat chickens kept in mobile pens that are moved daily should have 1.5 square feet of space. Full-grown bantams need 2 square feet in the hen house and 6 in the run. Layers need 3 square feet in the hen house and 8 square feet in the run. Large-breed chickens need 4 square feet inside plus 10 square feet in the run. Making sure the birds have enough room helps to prevent health and behavioral problems.

A reader questioned whether laying hens need perches. Everything I've read says they are much happier when they have perches. They stay cleaner, too. Perches should be 2-3 feet up off the ground so the chickens can fly up to them. Heavier breeds may need lower perches to keep from injuring their legs or feet getting on and off them. If the birds don't have room to fly, or if the perches are higher, provide a ladder so the hens can get up there. And perches should be all of an even height so the hens don't fight over who gets the highest one. The higher perches are more desirable, and the hens can squabble over them intensely as part of their efforts to sort out their pecking order (pun intended).

Hens share nest boxes, by the way. One box for every three to four hens should suffice.


**Update on 5/10/12: A recent article on chicken gardens suggests 250 square feet per hen for free-range birds. If you plan to free range them, plan on more space that in the urban farming article. But please note we STILL do not need anywhere near three acres to keep a few hens!

**Update for November 26, 2013: Chesapeake's City Council voted to make the "hen ordinance" permanent. HOA rules still apply if you have a homeowners' association, and ducks, keets, and other domestic fowl are only legal in areas zoned for agriculture.

Saturday, March 10, 2012

New Asparagus Beds

The new raised beds for asparagus and other vegetables are coming along well. The effort has been laborious because we had two or three days of constant rain after the topsoil was delivered. The soil was therefore wet and heavy. It has been hard work to move the soil from the delivery-pile in front of the house to the raised beds out back. We should have waited for things to dry out a little, but we are expecting the arrival of 30 asparagus crowns any day now, so we want the beds prepared and ready. And although our backs are aching, we are looking forward to 15-20 years of fresh, tender, tasty asparagus right in our own backyard for about three weeks every spring. We should also have extra to freeze so we can eat it later in the year.

The harvest won't be this spring, though. You can't cut the asparagus the first year, and only a little bit the second year, because this perennial plant needs time to establish itself. Then it will be strong enough to handle serious harvesting in the third and later years.

We garden organically. From everything I've read, asparagus beds need some serious preparation to thrive in our area. The crowns don't do well if they sit in wet, soggy soil for a long time. Our area is low-lying and prone to torrential rains in spring and fall. Friends have even told me that their treasured asparagus beds have rotted during a spell of bad weather in the past. This is one reason we went for raised beds, so that they will drain more easily to help keep the asparagus crowns healthy. The beds are deep because asparagus send their roots deep down into the soil.

The other reason for raised beds is that we thought they would be less work than tilling, but now we're not so sure that's true! We wish we'd had time to plan far enough in advance to set up these beds using the lasagna gardening technique, which we've used in the past with much success. It is much less work, much cheaper, very eco-friendly, and the results have been just as good if not better than with traditional methods. Over time we will use this method to start other beds, but with all the seeds I've saved and ordered, and with 30 asparagus crowns on the way, we had to do something quick, even if that meant more money spent and greater sweat-equity.

Asparagus are heavy feeders. Everything I've read about organic methods says to start with very healthy soil, i.e., one that is mixed with lots of compost and other organic matter. So this is what we are trying. Please note that we are not experts, so our ideas are not necessarily a recommendation since it will take a few years to see how the asparagus actually performs.

I described the construction of the frame for the beds in an earlier post. The frame is not required but keeps the gardens neater and more manageable. We used a wheelbarrow and trenching shovels to gradually move this pile of soil out back. We used trenching shovels due to the weight of the soil. They took more time but saved our backs.

Soil with moving equipment
You can also see my fiance, Don Burke, in the background with a lawnmower. He has been raking last fall's oak leaves out from under some bushes and is using our lawn mower to shred them up. We will mix this organic matter into the soil as an amendment. We also added some sphagnum moss, some composted chicken manure, and mushroom compost. The chicken manure is from a local farm.We've been composting it for a few months on our own property. The mushroom compost is all we could find this time of year at the local box stores. I'd like to add some vermicompost from my very own worm bins in my kitchen, but the vermicompost, to my eyes, has too many vegetable scraps in it and does not quite seem ready. I suspect we'd be better off waiting and adding it later as a top-dressing.

I've posted some pictures of the beds as they looked about halfway through our project as well as our leaf-shredding project.


Don raking out leaves to shred with the mower

Shredded leaves added to a bed

The beds in progress. The green thing in the back is a composter.

A cultivator, a very handy tool for mixing soil with compost
In case you are wondering why all the beds are fenced, we have three energetic and destructive, if much loved, dogs who would love to treat these raised beds as their personal digging boxes. In hindsight we would have been better off fencing in this section of the yard, and we may do so in the future.

Update on 3/17/12: Happy St. Patrick's Day! Don and I bought some fencing to go around the whole area for the beds to keep the dogs out. I paid a few dollars extra for the fencing-stakes that were made in the U.S.A. over the ones that were made in China. We plan to keep enough room to get a wheelbarrow or lawnmower through there. I added Scott's Organic Lawn Food fertilizer to the bed because it's what I had on hand. It's not a very balanced fertilizer and is quite high in nitrogen. After reading the label, I realized why the dogs are always trying to eat it. The top three ingredients are feather meal, meat meal, and bone meal. They probably think it's kibble!

We also bought cow manure to work into the beds and another kind of compost--the brand I forget-- that is half compost and half pine. It's organic. According to the bag, the mix helps the soil retain water and release it slowly to the plants. Our area is hot and drought-prone in the summer, so I thought it might be a useful amendment. We bought it at Home Depot if anyone is looking for it. I suspected its use will be more ecologically sound than that of peat moss, the use of which is controversial. We are about finished with the asparagus beds, so we are starting to move soil to the vegetable beds. We plan to put cow manure and the pine-water-retention-compost stuff in that bed, too.

Wednesday, March 7, 2012

Yellow Split Pea Stew

Here is another great recipe made with the local and regional foods we've been purchasing through our online food co-op. This recipe has been adapted from Great Vegetarian Cooking Under Pressure by Lorna J. Sass. If you are new to using a pressure cooker, do a little reading first. This book is excellent to learn how to use one safely. Be sure to include the oil because split peas are foamy when they boil. The recipe serves 6.

  • 1 tablespoon sunflower, safflower, or canola oil
  • 1 tablespoon finely minced garlic
  • 2 teaspoons finely minced fresh ginger
  • 2 cups coarsely chopped onions
  • 1 teaspoon each  dried basil, oregano, and rosemary leaves
  • 1/2 teaspoon whole fennel seeds
  • 1 bay leaf
  • 1 medium sweet potato, chopped
  • 2 small turnip roots, chopped
  • 4 cups vegetable broth plus 2 cups water
  • 2 cups dried yellow split peas, picked over and rinsed
................................................................................................................................
  •  1/4 cup fresh  minced cilantro
  • 1 cup fresh watercress leaves
 Heat the oil in the pressure cooker. Cook the onion and garlic for 1 minute or two, stirring constantly. Stir in the basil, oregano, rosemary, fennel, and bay leaf. Add the sweet potato, turnips, broth, water, and split peas, making sure the mixture does not fill more than half the space in the pressure cooker. Bring to a boil.

Lock the lid in place, bring to pressure, reduce the heat just enough to maintain high pressure, and cook for 10-11 minutes. Remove from heat and allow pressure to come down naturally. Remove bay leaf, stir in the cilantro and watercress, and serve.

Update: I made a variation of this that skips the sweet potatoes and other spices (except the bay leaves) and uses turnip greens, fresh mint, and fresh oregano instead of the cilantro and watercress. I put the mint and oregano in a bouquet garni, which I removed before serving. Delicious!


Tuesday, March 6, 2012

The "Little Tomato That Could" Early March Update


The "Little Tomato That Could" is still growing in our bedroom and getting to be a good size. In fact, it's outgrowing the garbage can that it lives in. Like Oscar the Grouch on Sesame Street it wants to pop the lid right up and peer out at the world. It has burned some of its leaves by getting too close to its fluorescent bulb light-source. Don needs to raise the bulb up again to give the tomato more room. I'm starting to think less about "if" it lives and thinking about "when" it is ready to harden off and move outdoors. Tomatoes can go outdoors around here towards the end of April, less than two months away.


I was planning to find some space for the tomato in our vegetable beds this summer, but Don wants to raise this particular tomato from a hanging basket. He is very protective of his project and wants to finish raising it himself. The squash Don rescued from our kitchen compost bin isn't doing as well. It is looking sickly, and I don't think it will make it until spring.


Sunday, March 4, 2012

Bluebirds of Happiness


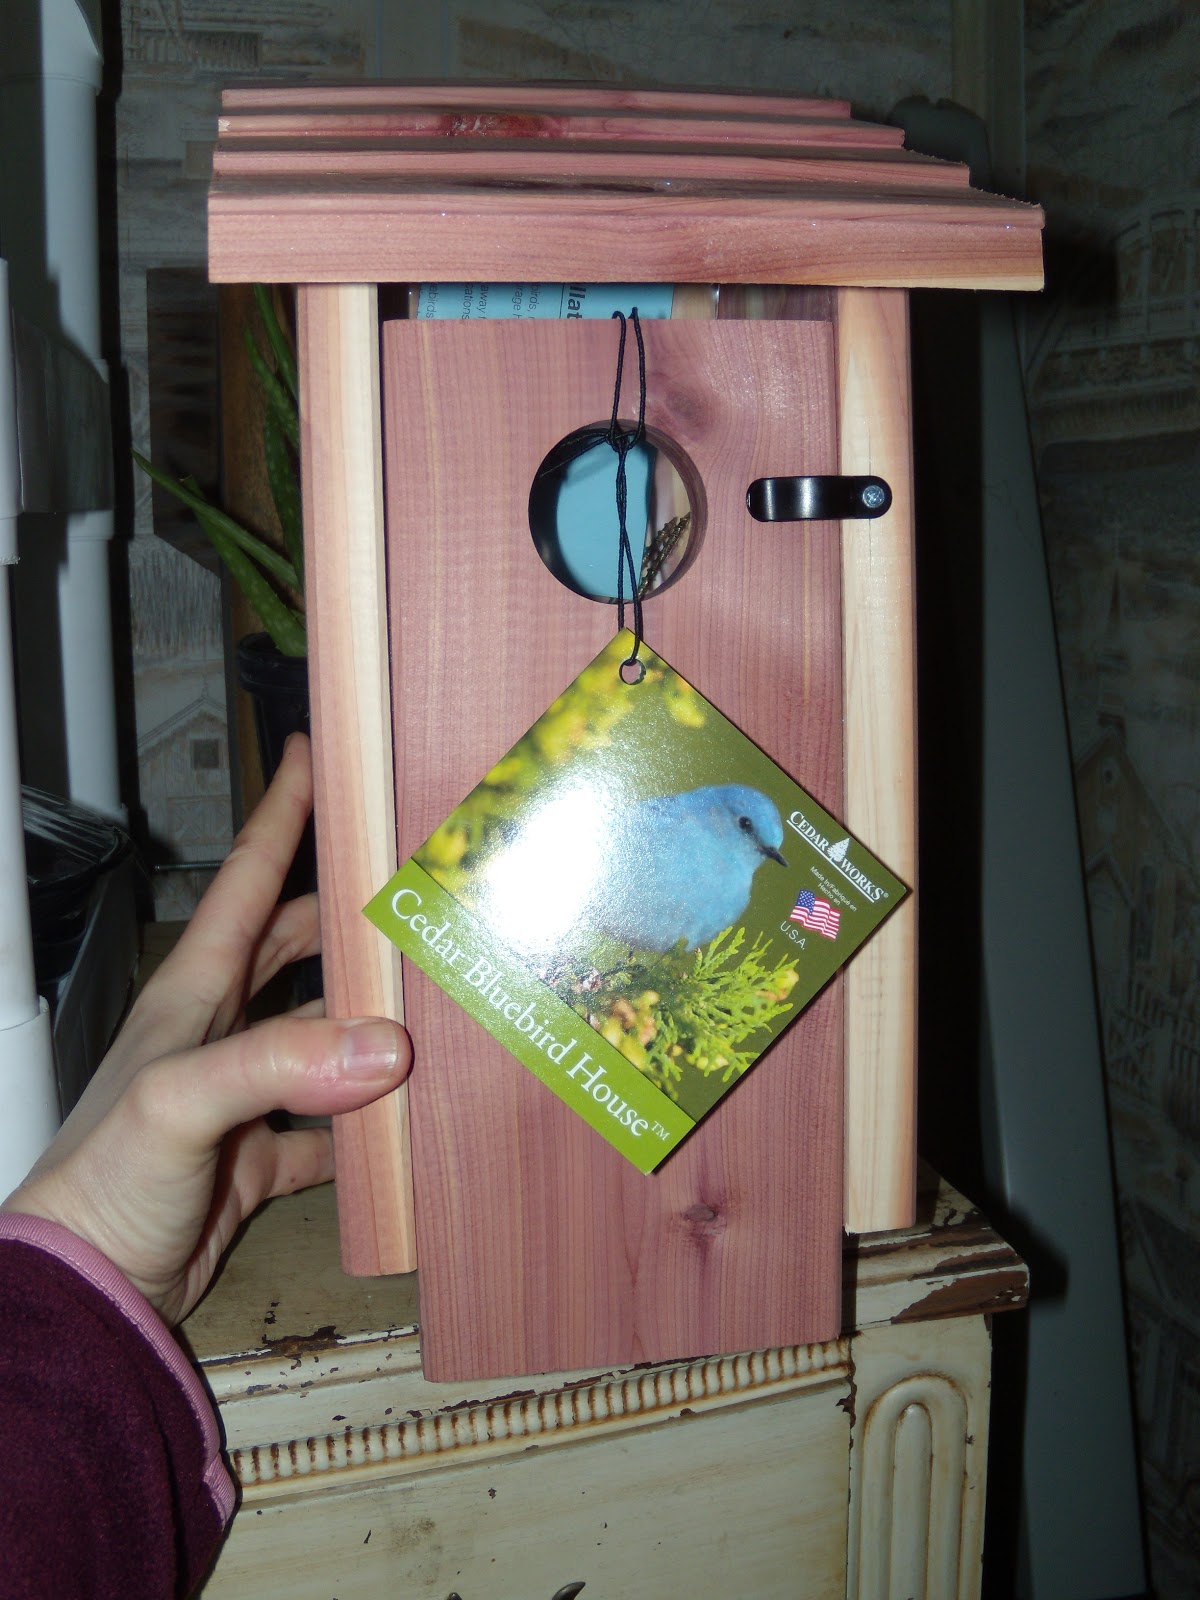
 Here is a picture of the beautiful bluebird house I bought recently. I already own one. Which is why I need two:


My past experience has been that house sparrows are more likely to move into the house than bluebirds. But I want bluebirds there. Not only are they beautiful, but they eat all kinds of bugs, which is why I want to locate the houses near my new gardens. What aspiring organic gardener couldn't use a little feathered help keeping pests out of her garden? Besides, house sparrows are thriving everywhere, whereas bluebirds seem to need some human help with their housing.

Eastern Bluebird

A little research has turned up the fact that if we put two (or more) bluebird nest boxes 5 to 15 feet apart, the sparrows will nest in one and the bluebirds in the other. Both birds are territorial, you see, and won't nest close to others of their kind. So we are going to give two nest-boxes a try this summer. We are a little late getting the boxes up, however, since the website says that they start looking for suitable nesting sites in February in the South.

House Sparrow


I was overjoyed today to see my first tomato seedlings sprouting on my kitchen counter. I have four: 1 Big Beef Hybrid, 1 Heirloom Italian, 1 Brandywine, and 1 Experimental Hybrid from Shumway. I look at these tiny, delicate little vines reaching toward the available light, and my mouth waters for the taste of home-grown tomatoes this summer. I hope some other vines sprout in the next few days, because these four little plants can't possibly be enough!

Clover Cover Crop

Clover Growing Beside the House

Another View, Clover
Don had a new heating and cooling system put in this year. The installation left the lawn beside our house a mess, with no vegetation and mostly hard clay on the surface of what had been our lawn.

He planted clover liberally on the bare spots. Clover is hardy, prevents erosion, feeds rabbits and pollinators when it flowers, and improves the soil. It fixes nitrogen from the air into the soil with the help of beneficial bacteria, and its roots delve deeply to break up hard soils like clay.Our container plants, mostly mint and peas, can be seen in the foreground.

Saturday, March 3, 2012

With Marigolds Sprouting, Can Spring Be Far Behind?

Of all the seeds I planted last weekend, the marigolds were voted most likely to come up first. The seed packet said they'd sprout as early as four days after planting. Well, my French marigolds surprised me. They started sprouting a mere two days after I planted them in their peat pellets and set them on the kitchen counter. My Cottage Red marigolds are coming up right behind them. For two or three days, I gasped in amazement every time I saw a new sprout starting to peek up above the soil. Such is the miracle of life. Here are pictures of my first "babies" of the new year:

 I had covered this plastic container with some plastic wrap to maintain moisture levels, but I removed it as soon as they began to sprout since the young plants need air circulation to prevent fungal diseases. These are the French marigolds. They are a dwarf variety.
Here are the Cottage Red marigolds, a taller variety that was discovered in Mexico. I turned on an overhead fluorescent light located by the kitchen window, and the young plants seem hungry; they are quick to turn toward the light as they turn green.

The topsoil arrived Tuesday. Don has been busy shoveling it into a wheelbarrow and filling in the two big beds out back. He is mixing in well-composted chicken manure and other organic matter as he goes. I suspect some sphagnum moss will end up in there. I hope some shredded leaves, too. We certainly have enough of them around this place!


Don has put some metal screening underneath the asparagus beds before adding topsoil. I was worried that mice, moles, and voles would dig their way into the bed from underneath. The asparagus is a 15-year investment of money, time, and energy, and I don't want to plant them just to have our furry neighbors gobble them up!


The fencing is to try to keep the dogs out. Don has now decided it will be easier for me to work in the beds if he fences in in the entire garden area rather than the individual beds. That makes sense to me. I don't want to step in the beds if I can help it, since compacted soil doesn't grow plants as well.


In the meantime, my container gardens are getting ready for spring, too. I have some turnip greens that are starting to bolt. I am thinking of letting them go to seed. My "Thomas Jefferson" radishes, the two that are left, are producing some wonderful greens, too, but I wonder if they are thinking of bolting on me. It's hard to believe they'd do that at the beginning of March, but the weather has been unseasonably warm lately. It was in the 80s yesterday, and these plants have survived  all winter, supplying Don and me with tasty greens, just waiting for their chance to reproduce.
Turnip Greens Bolting

More Turnip Greens

Radishes from seed from Monticello.

 In other planters I have mint coming up. One planter has volunteer mint coming up from last year's plants that went to seed. I didn't plant them, and I am trying to decide whether to keep them or pull them up. The plants are growing quickly so I had better decide soon! I have plenty of mint, but the new plants look so green and vigorous and young, I can't help but "root" for them; forgive the pun! I may give them away.


Volunteer Mint
I had one barren planter that Don recently sowed mustard greens in. Some of the peas that I planted last fall as a ground cover succumbed to frost, but most of it is still growing. The plants are even flowering again. Once Don gets my beds prepared, I can sow onions, lettuces, spinach, and peas in the next two weeks. It's been raining, so I hope it dries out enough that we can get the job done. I can hardly wait! But Don reminds me that moving wet soil is labor intensive.


Winter Peas
Update for May 4, 2010. I am sad to report that most of my tenderly nurtured sprouts died this year, even the marigolds, all except for most of the tomatoes, half of the pepper plants, and one hardy French marigold. 

I am not sure what I did wrong. The seedlings didn't get as much warmth and light as they have in years past. In my worry about fungal diseases, I may have under-watered them? I also may have fertilized them with a compost tea too early or not watered the solution down enough. I am hardly new to growing from seeds, so this came as a shock. 

I purchased some young onions, chives, and leeks to fill in some spots on my garden plan, but I won't be growing anywhere near as many as I would have if I could have grown them from seed, which is cheaper. I also bought some sweet peppers in case my tender seedlings don't make it. I worry about diseases from plants bought from a big box store, but I also hate the idea of a summer without home-grown tomato peppers. And if my babies live, I'll hopefully extend the season. I direct sowed some tomatoes in various spots, too, with the hope of extending my tomato season or at least giving myself another shot at the tomatoes if my first batch die. I've  updated my online garden plan with all the changes.

Don and I did not get the beds ready early enough to plant the peas. I will save the seed and plant them in the fall, at least the Alaska variety, which are the ones that I think made it all through last winter. I actually ate quite a few fresh, tender peas from these plants before I pulled the last of them up this week.

Actually, if you use peas as a cover crop, you want to cut them down in the early flowering stage, before they produce peas, because much of the valuable nitrogen in the plant goes into making the pods and peas. If you're growing as a cover crop, you want the nitrogen in the roots/soil and in the compost bin. But I can't resist fresh peas, so I'll supplement the soil with an organic fertilizer and maybe some compost, and hope to call it even.